Planetary Interaction
More actions
Planetary Industry (PI) (previously called Planetary Interaction or Planetary Production (PP)), is a type of Industry that allows pilots to create industrial colonies on just about any planet in the EVE universe. We will use the two terms and the corresponding abbreviations interchangeably for now.
In order to set up efficient PI farm, there are a few best practices that should be followed, but let’s start with prerequisites:
Skills
| Skill | Level |
|---|---|
| Planetology | 4 |
| Advanced Planetology | 3 |
| Command Center Upgrades | 4 (5 preferred) |
| Interplanetary Consolidation | 4 (5 preferred) |
| Remote sensing | 3 |
| Customs Code Expertise | 3 (5 preferred) |
| Gallente Hauler | 3 |
| Cloaking | 3 |
- This entire skill plan should take approximately 12 days (or less on a dedicated PI character with +3 or +4 implants). One MCT is more than enough to train two PI characters on one account.
Extraction planets
- Raw materials (mostly referenced as p0) are extracted from planets, using a planetary extractor, and the best practice is to route it directly into factories, and convert them into base products (p1) before exporting them from the planet. Minimal equipment needed on an extraction planet is:
- Extractor control unit
- Storage Facility
- Launchpad
- Basic Industry Facility
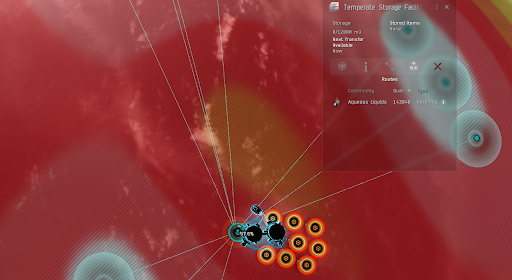
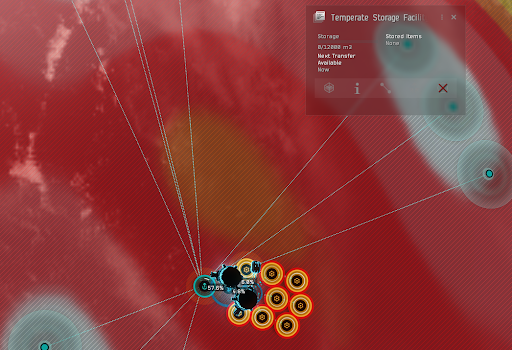
- Before starting the setup of a planet, make sure that the control center is fully upgraded. This will allow you to build an extractor that will operate maximum extraction heads, storage facility, launchpad, and up to 8 factories. On rare occasions, on Ice planets you will be able to build only 7 factories. Links cost CPU and Power (from the Command Center), and the bigger a planet is, the links are automatically longer, even if the structures are right next to each other.
- Note that no link needs to be created between the command center and the rest of the infrastructure. Command centers do have storage capability, but are not as effective for exporting goods as Launch Pads are.
- Before you start: Check what raw material is abundant on which planet!
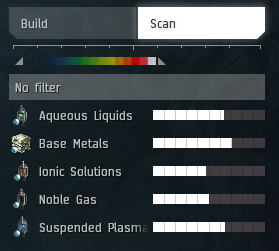
Each planet will have 5 different raw materials, and each one will have different ‘abundance’. You can check for that on the planet scanner. Open the planet in the planetary industry view: in space right click on empty space, Planets -> <planet you want to see> -> View Planetary Industry. Once you have a control center on a planet, you can access the planetary industry view through the Neocom industry menu.
- Looking at this scanner result, best raw materials to extract on this planet would be Base Metals or Suspended Plasma.
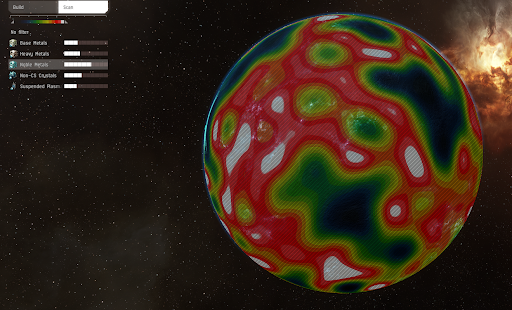
- When you click on one of the raw materials, you will get a distribution map:
- The way I use this is to have the left side of the slider on top always to the left, and then play with the right side of the slider, until only white peaks are left.
White peaks are the highest concentrations of the raw materials.
- All buildings should be linked to each other to allow the flow of materials as such:
- Extractor -> Storage Facility -> Basic Industry Facility -> Launch Pad
- The way I set up planets is in the following order:
- Build Extractor, Storage and Launch Pad. Link them, and commit
- Set up extraction, and route the output to storage facility
- Build eight Basic industry facilities, and link them to launch pad or to each other.
- Check if there is enough power for the last Basic Industry Facility, build it and link it
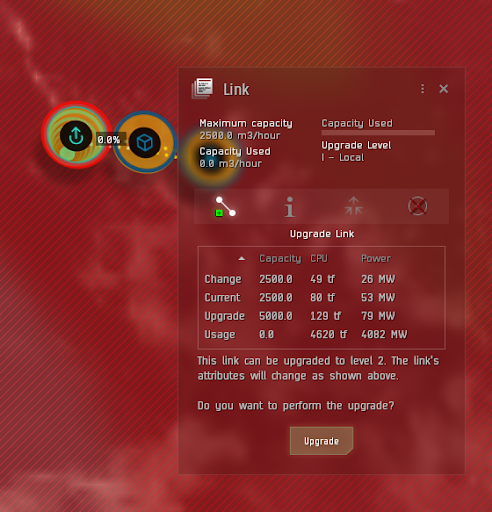
- If this setup is created in null sec, or WH space, the first link between the Extractor and the Storage Facility needs to be upgraded. Click the link, click the upgrade, and commit.
- Only after the link is upgraded to have enough capacity, can the output of the extractor be routed to the storage. In high sec, it’s usually enough to have no more than 5 Basic Industry Facilities.
Setting up extractions
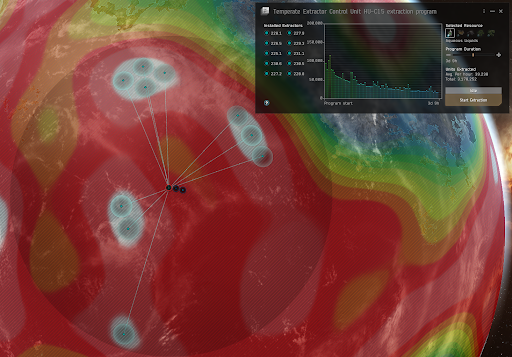
- Find a good cluster of 3-4 white peaks, and place your Extractor. When placing the extractor, you will see a large circle that covers the maximum range of the extractor heads:
- Drag the extractor heads to cover as much of the white peaks as possible and set the extraction cycle time (the longer the time, the larger the head area will be. Click start extraction and commit.
- My preferred extraction cycle is 3 days.
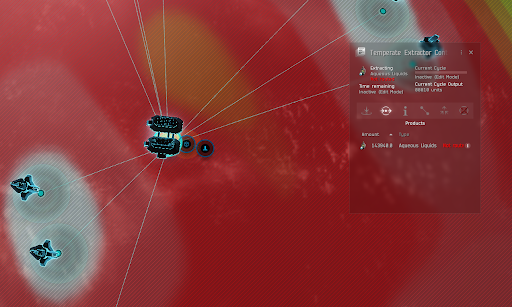
- To create the route, make sure the extractor is selected, click on the products icon (second from left), double click the product itself and then double click the storage facility.
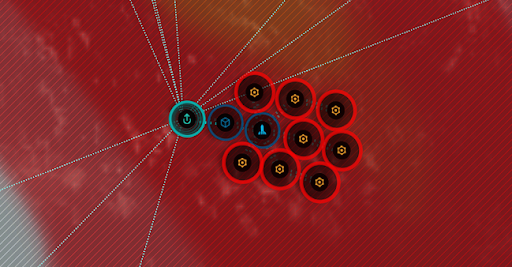
- Build all Industry Facilities and link them:
- Note that the facility will blink red if it’s not properly set up, whether it’s not set up for output, or if it doesn’t have input or output links.
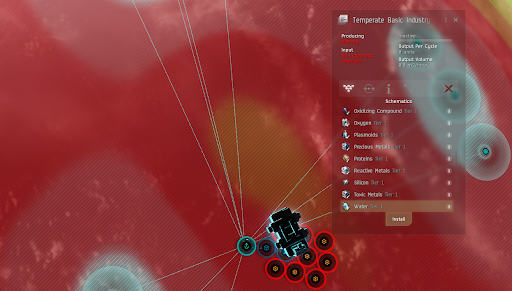
- Set up factories for product. Make sure to select the p1 that takes the extracted p0 as input.
- Once you click install, you will be in the routing mode for the output, so just double click the Launch Pad (we want all p1 to go straight to launch pad). Repeat for all 8 factories.
- To create input links, select the Storage Facility and click the routes icon
- Click on the incoming route (it will always have the large quantity and you can keep it on top if you sort the list by quantity), click create route, and double click a factory:
- Note that the border for the factory will turn from red to yellow. Repeat for other 7 factories and click commit.
- All that is left to do now is to come back in three days and collect the loot.
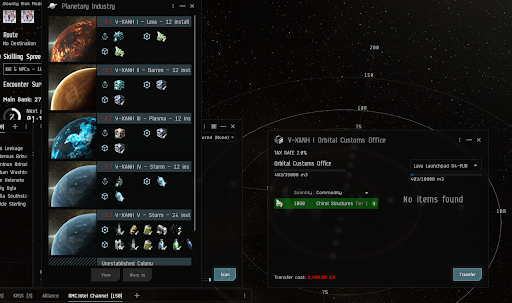
- Undock in your epithal, open the planetary industry window, right click the planet, select custom office => warp to 0.
Access custom office, drag the product to left side, click transfer, move to cargo, profit!
- Important note, when placing Control Centers on planets, you can be in space, tethered to a POS. No need to warp to a planet to place a command center!
Factory planet setup
- Now that we’ve covered extraction planets, lets convert all that p1 into p2 and p3 goodies.
- For factory planets, we need (again) fully upgraded command center, and the following modules
- Launch Pad
- Storage Facility
- Advanced Industry Facility
P2 setup:
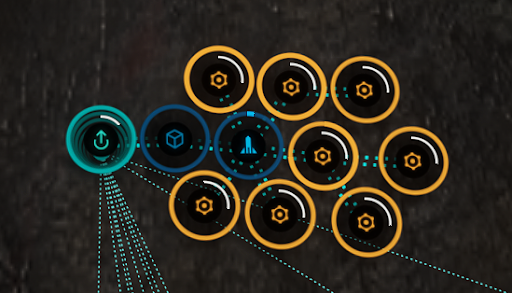
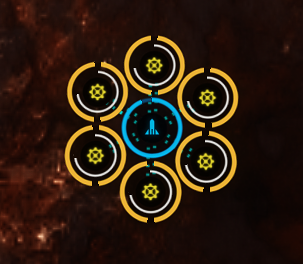
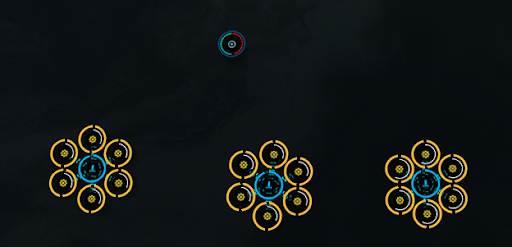
- P2 setups are usually simple and easy to create. The way I do them to avoid unnecessary modules is to place one launch pad, and surround it with six advanced industry facilities:
- Each industry facility is linked directly to the launch pad, gets input from it, and returns output to the launch pad (so the launch pad acts like a buffer)
- One planet can have up to three such setups:
- Again. The control center doesn’t need to be connected to anything, nor do the facilities need to be connected to each other.
- Select the p2 that will be created, install it just like you would install it for p1 production, route the output to the launch pad.
To create the input routes, load up the actual p1 materials into your epithal, place them in the launch pad (make sure to use the correct launch pad if there are multiple ones on the planet. Each one will have it’s own unique name). Select the launch pad, click the storage icon, and from there double click each of the p1 materials, and then double click the factory that will receive that p1 material. Repeat for both p1’s and all six factories. Lots of clicking, but it’s a one time setup only. Next time you load up the raw materials, the factories will start churning everything automatically. The maximum amount that can be loaded into the launch pad is 12960 of each p1. This amount is enough to feed all six factories for a day and a half, without leaving any leftovers in the end.
P3 setup
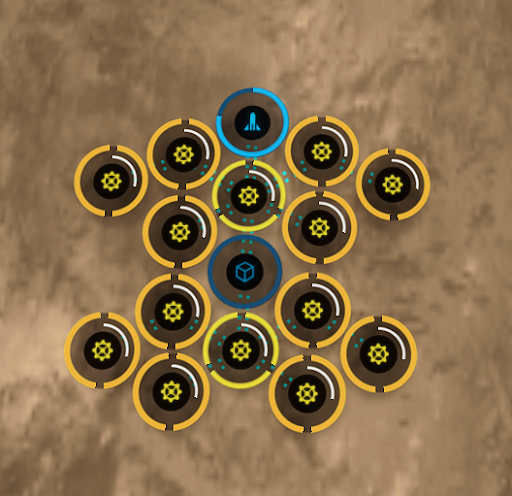
- P3 setups are a bit more complicated, since we are dealing with either 4 or 6 different p1 inputs, and we need a bit more facilities to set up everything right
- In this setup, the industry facilities directly below the launch pad and the storage are creating the p3, while the other 12 are creating the p2 inputs for p3 production.
- The storage facility will almost always be empty, but it’s there to act as buffer for all p2 materials.
- The way this setup of mine works is as following
- P3 output routed direct to launch pad
- P2 output routed to storage facility, and from storage facility to factories
- P1 fed directly from launch pad into p2 factories
- Creating links from storage to P3 factories is a bit tedious, since there is a lot of clicking to do. The best way is to select the storage, and go to the routes. There will be four incoming routes for each p2 material. Two of the incoming routes should be routed to one p3 factory, and two to the other one.
- Routing the p1 materials into p2 factories should be done just like for p2 only facilities. Load the p1 into the launch pad, and route from there. For setup with 6 different p1 inputs, load 4320 of each P1 into the launch pad. For setups with four inputs, load 6560 of each p1.
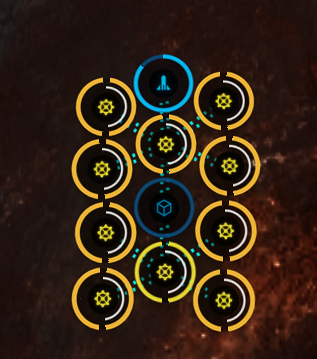
- Building P3 that has only two inputs would be done in a facility that looks like this:
- Same principles apply for setup and routing. Center line factories make P3, side factories make P2, and all P2 materials are routed through the storage facility
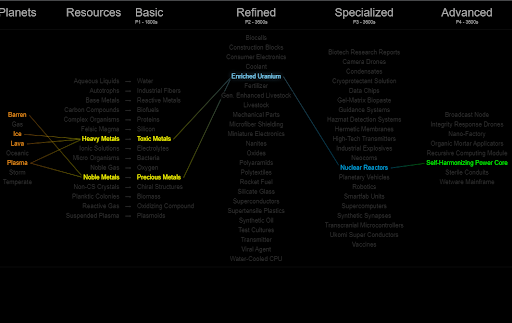
- I don’t do any P4 manufacturing, but if I did, I would still make p1-p3 chains, export the materials, and create a new facility on another planet to build the P4. Keep in mind that P4 can be built only on barren and temperate plants.
Useful tools/websites
1. https://hanns.io/pi/ - PI scheme. Just hover your mouse over anything, and see how it relates to anything else
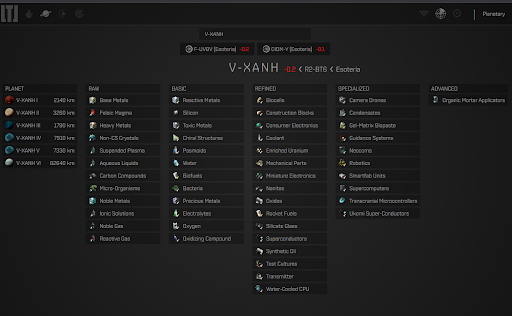
2. https://www.eve-webtools.com/Planetary/ - Similar to hanns.io site, but it has a very nice feature called System Checker, that will let you see exactly what can be created in which system. (and also gives the size of each planet)
3. https://planetsin.space/ is a webapp / discord bot that you can use to help remind you to do your PI. (Goonfleet forum post)
Original guide written by Kuatthlor

