Abyssal Deadspace
More actions
| New Players | PVE | PVP | Exploration | Industry |
|---|---|---|---|---|
| Newbee Survival School | PVE School | PVP School | School of Exploration | Industry School |

The abyss is about actively engaging with PVE, and reaping substantial rewards for that effort. The goal of this guide is be useful and accessible, whether you're a cute new bee in an Alpha clone, or a vicious bittervet with more ISK than sense. Despite how scary it may sound, the abyss can be a fun and engaging place to spend space pixel time.
Below are some reference links to other resources for flying in the abyss:
- This is a basic EVE tracker that can be very useful in tracking your progress through the abyss. It collects data on everyone else doing abyssal runs so you can see what is popular and what isn't in terms of ships and fits. It does not give you much in the way of context so be wary as using it as your only source of information, lest you want lose 144 million ISK Worms in T1 Dark sites.
- This is obviously someone in EVE Uni's dissertation on the abyss. It's better written than this guide so read that if you want some quality information instead of the dumbed down version which you'll find here. However, like a lot of information in EVE Uni while it is great at describing the ins and outs of what something is, it falls short in giving solutions on how to actually do it. Still, it's a wealth of information so definitely give it a read.
What Is Abyssal Deadspace

Abyssal deadspace is (mostly) a series of 3 deadspace rooms in a chain connect by transfer conduits (basically an acceleration gate with a triangle RP name). You can enter abyssal deadspace by using a tradeable item carried in your cargo hold, called an abyssal filament.
Entering abyssal deadspace via filament requires that you are currently in a fleet, and that you use the right number of filaments for the ships you plan on bringing. The current breakdown is this:
- 1 filament = 1 cruiser sized hull (no T3Cs)
- 2 filaments = 1-2 destroyer sized hulls (you CAN use T3Ds, approx 2x loot )
- 3 filaments = 1-3 frigate sized hulls (approx 3x loot)
The number of filaments is based on hull type. You cannot mix and match, and you have to use the right number of filaments, even if you're only bringing in 1 frigate. If you are in a frigate or a destroyer and are going solo, you also need to be in a fleet and bring the correct number of filaments for whatever type of portal you are opening. So, if you are running a solo Kestrel, you need to form a fleet for yourself (don't even put an advert up just open the fleet window and hit "form fleet"). Next, you'll need to make sure you have the correct amount abyssal filaments for whatever type of abyss you're running, so if you're running a calm dark (recommended most for newbie Kestrel runners) you'll need 3 calm dark filaments, you'll need to be in fleet, and you also need to be away from structures and somewhere in space. General advice is to make a safe in the system you are using and run it there. If you are running them in lowsec or nullsec, be warned, your gateway can show up for people hunting juicy ships so take that into consideration. Most abyssal runners use an alt in highsec for this reason.
Abyssal filaments come in 7 tiers, numbering from 0-6. This corresponds to the difficulty of the rats spawned in each room, and the average value of loot you will fail to extract when you die to the timer.

A large part of abyssal deadspace encounters is how random they are - each room is chosen from 12 different seeds of 7 faction rats (see: below), and populated by a semi-random distribution of rats. Each room also has 1 bioadaptive cache (loot box), 0-3 resource caches (many players rightfully ignore these), 0-2 Triglavian towers, and 1 transfer or origin conduit. These are gates to the next rooms in the chain, or back to the spot where you filamented in (respectively).
The structures cannot be destroyed, and the towers can either help you or hurt you.
NB: the entry point spawned by an abyssal filament doesn't despawn. This means that people can, and will, scan down where you entered the abyss and gank your ship when you extract. https://zkillboard.com/kill/88439908/
Abyssal Weather, Effects, and Towers

By now you’ve probably noticed that there are several different flavors of abyssal deadspace filament. These correspond to the weather and effects present in the rooms you will encounter. Each type of filament offers one penalty, and one bonus. The bonuses are always the same, but the penalties range from 30%-50% in T0-T3 filaments to 50%-70% in T4-T6 filaments. The weather and effects apply to all ships and drones inside the deadspace pocket. That means that your new EM hole is also a new EM hole for that fucking triangle burning through your structure.
Weather
The forecast is not sunny.

Electrical: 30-70% penalty to EM resist, 50% bonus to capacitor recharge

By far the most costly type of filament, and the easiest to run due do the relative prevalence of active-tanking (read: shield boosters and armor repairers) in abyssal deadspace. Electricals were insanely profitable to run but like everything else that becomes popular, they've also become the most expensive to buy on the market. Electricals are fun to run because you can do things which are normally impossible, but people have a very hard time transitioning from electricals to anything else for exactly that reason. They are good way to expose yourself to abyssal deadspace but the cost of the filaments makes them the least profitable to run.
Exotic: 30%-70% penalty to kinetic resist, 50% bonus to scan resolution.
Exotics have a pretty good loot table and the penalty to kinetic resist makes them generally not very intimidating, as most of the dangerous rats inside abyssal deadspace will use OMNI, EM, or THERM/EXP damage. The scan resolution bonus does not help, but at least the guys shooting you aren't benefitting from it either. Exotics are also one of only two types of filament which can consistently be run at high tier with a passive shield tank.
Dark: penalty to turret optimal and falloff ranges, 50% bonus to maximum velocity---

Dark filaments are in a very weird spot. The penalties mean that bringing any drone or turret based ship into one is almost a guaranteed loss mail, but the velocity bonus also hurts missile DPS. That being said, they are hands-down the most beautiful thing in this game, and the fucking art department deserves a medal for how good they look.
These are almost exclusively run by frigates and Jackdaws (do not use a T1 destroyer), and with some fairly good results at higher levels (only a 30% loss rate, for a trio of Hawk/Hawk/Nemesis which is usually paid for by your second loot cache).
Running these can be suicide if you get a spawn of Sansha rats, as they apparently don't care about optimal range or tracking and the speed makes these guys even harder to hit than normal. Leave these alone, generally, unless you're running low-tiers in a missile ship or know what you're doing.
Firestorm: penalty to thermal resist, 50% bonus to armor HP

Firestorm filaments are great for active tanked ships relying on armor. The most commonly used ships in these filaments are Triglavian assault frigates, and the dreaded Ikitursa - both of which fit purely for resists and active tanking, and enjoy the added bonus in lieu of fitting a buffer which would kill their impressive speed and extremely low sig radius. It helps that they also put out shitloads of thermal damage.
Unfortunately this also makes every Triglavian rooms suck that much harder, as the rats thoroughly enjoy their added 50% HP and shit in your brand new thermal resist hole. (Don’t forget most trigs remote rep each other at T4 and above). These filaments require a little more skill to fly due to heavy neuting, and a little more foresight to plan for, but they are good fun and their loot table is very strong in the mutaplasmid department, even at low levels.
Gamma: penalty to explosive resist, 50% bonus to shield HP

Like Firestorms, Gamma filaments have a nice way of curbing your enthusiasm for HP bonuses once you realize that drifter battleship targeting you is also enjoying 50% more shield.
If you have the dps skills for it, however, gammas are an amazingly reliable source of ISK. they have a reasonably good loot table, but being able to get a shield Gila to 500 hp/s of passive regen with no dependence on capacitor for anything but your AB is crazy good. Before moving up tiers in Gamma filaments, always do a few test runs on singularity (see: below), because your DPS output matters way more in certain rooms (Karen, Sanshas, and Concord/Upwell to name a few).
For lower tiers where you're not racing against the clock, Gammas are an amazing way to learn the rooms and build up your niche fitting skills, and probably the most forgiving of the low tier rooms outside of Electricals (provided you can shoot into the explosive resist hole of the rats). This is where you take your stabber, if you're into that sort of thing.
Abyssal Towers

There are two types of abyssal towers that may spawn in each room, adding AOE effects to ships within their radius (varying from 15-40km). These tend to spawn more frequently at higher tier. Knowing how react and take advantage of them is part of being "good" at the abyss.
Deviant Automata Suppressor
This tower shoots out tracer shells in every direction and is immediately recognizable. In addition to looking like the battle of Britain, this thing will kill any drones that get near it, including both drone rats and the drones you're using to kill those drone rats. The AOE damage gets more potent the closer you get to the tower, and I’ve taken advantage of this fact many times to clear entire rogue drone rooms without firing on anything but the cache.
Multibody Tracking Pylon
Nice little AOE buff of +60%-80% to turret tracking for all ships in a radius around it. Could be good for you, could be your worst nightmare. Depends on what room you're in. generally you can avoid these to be on the safe side.
Clouds

Sometimes in the abyss you will notice poorly render patches of nebula which you can fly through. This is usually bad for you, and slightly less bad for the rats. Keep your eyes peeled, and if you're running dark filaments good luck because they all look the same shade of gray.
Clouds come in 3 flavors...
White: 300% speed boost - Hitting one of these with an MWD on will kill frigates (you get launched from the room at 15km/s). Letting the rats hit one is a recipe for a bad time as you will have to wait for them to get back into optimal range, or go chase them.
Orange: -40% shield boost duration, -40% shield boost effectiveness - Essentially you don't lose any potential HP/S, but it does turn your boosters into hungry hungry hippos who will drain your cap faster than normal.
Blue: 3x multiplier to sig radius - This one will get your drones one-shot by a lot of abyss rats. It also makes small rats much easier to hit.
General Strategy


- Enter the room and assess. If you are unsure what the rats in the room will do, the safest bet is to burn away from the direction you entered from, zoom out, turn the tactical overlay on, and get a larger view. You'll see what rats start chasing you and what rats stick close to the gate. Keeping range and kiting will generally work (until it doesn't) as the odds are usually in your favor with speed+range.
- Make note of clouds/location and use this to your advantage or peril.
- If you are in something fast and hit a white cloud, particularly in Dark abyss types, you will die if you do not immediately press ctrl+space to stop your ship.
- Always pop the bio-adaptive cache in each room. They are the ones nearest to the gate. Generally ignore extraction nodes unless they happen to be in your flight path.
- Bring an MTU and drop on the gate while you are still clearing rats, if you want to be able to pop a few nodes in addition to the bioadaptive cache - however time is going to be the biggest enemy here so be mindful of it.
- Try to get each room done within 5 mins. With 3 rooms that gives you a completion time around 15 minutes with 5 minutes leftover for padding should you want to try to burn the 80km to get that last extraction node with 200k ISK worth of red loot that you don't need.
Abyssal Rat Types
Abyssal rats aren't like normal rats. They’re smart like. And they got a taste for blood.
Key Rat Differences:
- They will switch aggro to your drones. Be ready to pull them back. #They will change targets and prioritize. #They will focus fire logi (this may be deliberate or just a tendency for rats to focus fire)
- They will kite, they will brawl, they will try to position themselves optimally by outflying you if you aren't paying attention.
These rats are going to be put in order from most notorious to the least - with tips and theory to stop them from pulling your snakes. Maybe I’ll add screen shots at some point but for right now everything you really need is right here, just close your eyes and imagine.

RAT 1: Drifters and Sleeper drones
KEY NOTES: KARYBDIS TYRRANOS
K will always fly away from you, up to the border of the room. This makes it possible to herd her, and you will need to herd her back towards the gate at highest difficulties or you will die to time. K starts bringing friends to the party at T2, even though you didn't invite those fuckers. You absolutely must prioritize WEBS followed by NEUTS, everything else is irrelevant. And I mean everything else, including K. K has a fuckton of shield HP and resist that doesn't seem to be effected by the weather. A GAMMA K IS A FUCKING BOATLOAD OF HP. K has heaps of armor and structure HP but shit natural resistance profile when her shields are down. It melts quickly. ~~IF YOU FLY STRAIGHT TOWARDS K FROM MORE THAN 15KM AWAY YOU WILL DIE~~

KEY NOTES: EPHIALTES AND SCYLLA TYRRANOS:
- EPHIALTES or SCYLLA TYRRANOS are cruisers which will either spawn with K, or spawn independently in much larger numbers.
- Destroy webs and neuts first. A little overheating on prop and weapon mods is fine but not much, and only if you're worried about time.
- Karybdis Tyrranos is widely regarded as the hardest room in the abyss, and rightfully so. As soon as you load into this room you have a few seconds to get your bearings and start moving before you are literally alpha'd off the fucking grid as Karen pings your manager.
- The dead tell for the karen room is that there is only one battleship that spawns, and she spawns no matter what difficulty you're doing. The alpha strike from the Karybdis Tyrannos is enough to put most cruisers into mid-armor or even structure, and vaporize frigates if she lands dead on. You will be alpha'd by a WRECKING SHOT unless you have a good buffer as a cruiser.
- When K is present you need to start off by manually piloting in this room - click an area in space for your ship to fly to which puts you not far off the BIOADAPTIVE CACHE, but which keeps you moving at least a 45 degree angle to K. as you approach the cache, pop it and snag the loot (try to manually fly through the loot cache to grab it, but it’s okay to approach and then give another move order as long as you are quick)
- K's escorts will be EPHIALTES sleeper drone cruisers, or SCYLLA TYRANNOS cruisers. SCYLLA TYRANNOS will either web or scram, and may neut (higher difficulties). EPHIALTES ENTANGLEM will web, and EPHIALTES DISSAPATOR will neut. viewing the full cruiser name in the overview will let you know which (look for ENTANGLING or ENTANGLEM).
- The sleeper only version of this room follows the same principles, but is generally easier as long as you make sure your target priorities are on point.
RAT 2: The Hadal/Benthic Abyssal Overmind (OM)

KEY NOTES:
- OM flies away from you, like Karen, but seems less intent on doing so. OM is also a dominix with that cool skin so it stands out in a crowd.
- OM has nasty hybrid weapons which can fuck up your day if you get webbed.
- OM has a web (T5+).
- OM has ridiculous armor HP and resistances and is 100% a DPS check on what your ship can do. The guns are dangerous, but the real peril when fighting OM is time.
- Escorts: OM will spawn with a flight of rogue drones. Prioritize the rogue drones as follows: SNARECASTER (web) > FIREWATCHER (neut) > PLATEFORGER (remote reps) > OM > Other
- The big issue with this room is time. collect the cache on your way to the OM, and you will probably have plenty of time to clear out any additional escort drones like sparkgrips before you get to OM. if not, it's fairly easy to clean them up on your way back to the gate. Be extremely cautious about the WEB from OM at higher levels, and manually fly if you need to in order to keep transverse up. If you're brawling, heat prop or tank depending on if you can avoid the shots or if your modules are already half-melted from fucking up some other room.
RAT 3: The Angel Room

KEY NOTES:
- Target priority is everything here. While you are webbed and neuted the Angel ships will have no problem applying a terrifying amount of DPS.
- DO NOT LAUNCH DRONES EARLY. Your drones will overshoot their targets if you do. Instead, wait until the rats overshoot you first - they're literally too fast to properly stay on you during their first pass and that is the time to launch drones.
- RECOMMENDED TARGET PRIORITY: ELITE LUCIFER CYNABAL > CYNABAL > ELITE LUCIFER DRAMIEL > WEBS > NEUTS
- This room has ended many runs for many folks. The Angels are, frankly, terrifyingly fast and very good at applying webs and neut pressure to keep damage application up. The spawns are the most random I’ve seen but the approach to solving this room is the same every time - read the recommended target priority above.
- You may need to break from this pattern if you get a lot of neuting frigates (FURY), or a lot of repping frigates (BURST). Don’t hesitate to change your priority if you feel a lot of neut pressure, but NEVER CHANGE TARGETS HALFWAY THROUGH.
- The rats here have a nasty shield tank (especially ELITE LUCIFER rats), so be very cautious about this room if doing a GAMMA filament. KITING IS NOT ADVISED, BECAUSE THEY WILL CATCH YOUR FAT GOON ASS. The best you can shoot for is trying to stay out of their optimal – don’t think you’re gonna sit back and watch them play grab ass with your drones from 30km away.
- At lower levels this room spawns a trivial number of ships, at T5 and T6 you can have 4-5 cruisers spawn. Oh well, at least we don't have to deal with machariels.
RAT 4: Sansha's Nation Room

KEY NOTES:
- Like the Angel room, this room is chiefly about target priority. Flying right has less to do with anything in this room because the rats can and will shoot you accurately from 80km away and they don’t give a fuck about your transversal.
- Kiting can and will help moderate damage, but it will not prevent it and kiting is not very easily implemented here. Under no circumstances should smaller ships brawl with Sansha’s rats in the abyss.
- ALLOWING THESE RATS TO GET INTO A WHITE CLOUD (SPEED) CAN BE VERY VERY BAD FOR YOU. If you see a white cloud, drag them away from it.
- Sansha's room is the hardest room for DARK filaments, because the rats are basically unaffected by both the bonus and penalty from DARK space.
- RECOMMENDED TARGET PRIORITY: DEVOTED KNIGHTS > WEBS > SMITHS/PRIESTS > OTHER
- The biggest challenges here are getting the DEVOTED KNIGHTS off the field as quickly as possible. They have very strong webs and neuts which are a persistent threat. All rats have excellent tracking and range, so much so that even in a dark filament they will have amazing application.
- You may need to change target priority if a lot of DEVOTED PRIEST spawned with your room, as they focus their reps on whatever you are attacking.
RAT 5: Triglavian Collective

Unlike the previous rats, Triglavians come in several different configurations - we will go over a few of their rooms here along with some general tips and tricks for fighting the triangle.
GENERAL TIPS:
- Entropic Disintegrators (triangle weapons) have no falloff, but instead turn off if you kite outside of their range. This is a really good way to cause them 'reset' their damage (they spool up the longer they maintain fire on you). THIS MEANS KITING.
- All triangle ships have remote repair capability, but not all of them use it all of the time until T5+.
Triangle ships are fast, maneuverable, and have very low sig radius - making tracking and application a problem in some environments.
- Triangle drones stop attacking you once their drone tender has been destroyed (ships with VILA in the name).
If you are not under web/neut pressure, feel free to target any RENEWING RODIVAs on the field, as their reps are insanely good and they may cause you to waste time and dps if you do not clear them (mostly higher tier).
KEY NOTES: KIKIMORA ROOM
- This room contains many KIKIMORAs, DAMAVIKs, and possibly 1-2 RENEWING RODIVAs at higher levels.
- KIKIMORAs tend to form a cuddle puddle, orbiting each other while staying just within their weapons range. use this to your advantage and KITE THEM if their damage has ramped up too high for your tank
- TARGET PRIORITY: TANGLING > STARVING > RENEWING > STRIKING/GHOSTING > OTHER. Prioritize a tangling kikimora over a tangling damavik, but a tangling damavik over a starving kikimora.
KEY NOTES: VEDMAK ROOM
- This room contains VEDMAK cruisers escorted by smaller Triglavian ships, and possible RENEWING RODIVAs.
- If the room spawns VILA VEDMAKs (drone cruisers) one of them will be a SHINING VILA VEDMAK. This target should be a priority after removing web/neut pressure, as it heals the other drone cruisers.
- TARGET PRIORITY: TANGLING > STARVING > RENEWING > STRIKING/GHOSTING > OTHER.
KEY NOTES: LESHAK ROOM
- Depending on your fit, this may be easiest room to handle in the whole abyss. You will start 30-60km away from the LESHAKs who will be bunched up on the gate. When you enter they will star burst and burn away from each other while repping each other - however they spawn at very low HP and should not be a problem if you have 30-50km range.
- Feel free to burn down one of their handful of rogue drone escorts if you have an opportunity while burning towards the cache/gate.
- STARVING LESHAKs can neut out to 80km and should be killed first, followed by BLINDING LESHAKs. As the LESHAKs run away from you, the BLINDING sensor dampening can hurt your ability to run them down, causing you to waste extra time.
- TARGET PRIORITY: STARVING LESHAK > BLINDING/TANGLING LESHAK > OTHER
RAT 6: Rogue Drones

Rogue drones come in two basic configurations. The first is a swarm, which is not very difficult to clear as long as you prioritize targets appropriately and keep moving toward the cache and gate. The second configuration is a group of rogue drone battlecruisers which is extremely deadly if you get too close.
KEY NOTES: ROGUE DRONE SWARM
- Stay on the move, and use any drone automata suppressors to your advantage.
- Target priority is based on ECM and reps. WEBS > NEUT > REP > OTHER.
- Players using a reactive armor hardener should cycle it regularly. Different drones are locked to certain damage types (i.e. sparklance do EM, emberlance do thermal), and it’s no good having +25% EM resist when all the EM drones are dead.
- 100% of this spawn is susceptible to the DEVIANT AUTOMATA SUPPRESSOR. Use that to your advantage.
KEY NOTES: ROGUE DRONE BATTLECRUISERS
- These drones have extremely limited range, but their damage is absolutely terrifying. They are best kited by orbiting the gate at 20-15km with your prop mod on after you fly past them the first time.
- No, seriously - stay the fuck away from these guys. You'll think they are a joke until you get into their weapons range once on accident and they fucking murdered you.
- IM NOT JOKING FUCKING KITE THESE THINGS.
RAT 7: Concord and Upwell

KEY NOTES:
- Leave Upwell ships for last, as their vorton projectors also hit the allied Concord ships. lol
- The Marshals are no fucking joke. While they start with low shields and armor, their shields will quickly repair, and their missile volleys hit like a tractor trailer moving at light speed. Without a strong tank you must rely on speed, which makes killing webs quickly essential to your survival.
- Upwell ships will kite, but Marshals will stay on the gate.
- GILAs in particular will get their shit pushed all the way in by the Marshal, don’t be any closer than you need to be and almost never come in directly at them (missile application is crazy like that, huh?)
- TARGET PRIORITY: ARRESTER > DRAINER > MARSHALS > OTHER > UPWELL
- Concord ships use extremely strong missile systems which are very difficult to avoid. Your best friend in this room is your speed, so do whatever you can to stay mobile. Smaller Concord ships are also fairly quick and will stick close to you with their webs and neuts, so popping them is an extreme priority.
- Take advantage of the fact that the Upwell ships don't have their safeties set to green, and their vorton weapons will bounce off their allies. Fuckin lol
CHOOSING A SHIP, A TIER, AND AN ENVIRONMENT

So somehow you've read this far and decided that this might be the place for you. You’re into the idea of making (decent) isk per hour, and you love a good challenge! Because really, how hard can something made by half-baked Icelanders be???
The first thing you need to do before setting foot into the abyss is read this guide - but since you're currently doing that we can move on to the second thing. Every activity in EVE is an investment of your current pool of ISK, and nothing takes that to the extreme like the abyss - but the barrier for entry is incredibly low (unlike literally everything else in this shit game). alpha clones can and do run abyss sites to pay for their omega subscriptions, and then work their way up as they learn skills like target priority, fitting, and the dreaded manual piloting.
For ease of access, I have broken this down into three tiers of players who typically want to get into the abyss:
- I'M POOR AND I DONT KNOW HOW TO FLY (<500m ISK, <10m SP)
- I'M NOT ~POOR~ BUT I DONT KNOW HOW TO FLY (<1b ISK, <25m SP)
- IM SPACE RICH AND I KNOW HOW TO FLY (2-3b ISK, All Cruisers V, Resistance IV-V)
Restrictions
- Tech 3 Cruisers are not allowed - they are too tall to ride the abyssal rides.
- Fleet-mates cannot warp to you while you are within the abyss, nor can you warp out of it.
- You cannot cloak
- You cannot deploy a mobile depot.
- There is no Local chat channel (thank god).
- Core Probes and Combat probes launched will be removed from space shortly after launching and cannot :*be recovered.
- The Directional Scanner will not work.
- The map will not work.
- Sometimes you just get unlucky
Cheap Forgiving Ships

Players in this situation actually have a lot of options. All environments can be run at low SP if you use recommended fittings and stick to T0-T3 filaments. These players can expect to invest as little as 15m ISK or as much as 400m ISK in a ship and can earn as much as 120m ISK/hr (although they will generally earn lower than that without better skills).
Your hard and fast rules are as follows: always start by running T0-T1 filaments of the type you want to learn first. Plenty of racial frigates can be used safely and effectively, but my personal preference is to run dark sites in a Kestrel to start (T0) and move up to running them in a Hokbill (T1). My main reason for this is it gets you started on missile skills that will be used in a Gila.
That said, it is also totally possible to run Electrical, Exotic, and Firestorm sites in a Punisher - making it the most flexible T1 ship of the all. That said, there are dozens of low tier fits that work, so try what you like. The main bar to entry for completing a T1 abyssal filament is the ship needs at least 90dps to break the Skybreaker rats should they spawn.
There are many ship fits listed below that have been tested by the authors of this guide that we can assure you - work - mostly.
Notes
- With any level of the abyss, SiSi, is a great option for testing out your hair-brained-theory-crafted-3 AM-meme fits. SiSi or not, T0 or "Tranquil" is the recommended starting place, should you want to just #yolo into it on the live server.
- Unfortunately the TRISTAN seems to underperform, not really having enough slots to fit the needed prop mods and an appropriate tank in low tier abyssal deadspace.
- Try to make sure your ship and filament choices complement each other. Don’t take ships with bonuses to armor into Gamma filaments. Don't take shield tank ships into Firestorms, etc.
- After you feel comfortable with the type of filament you have chosen and mostly know how to fly in it, you can look into flying cheap T1 and Faction cruisers in T3 and sometimes even T4. These ships will set you back a few hundred million isk, but cheap GILAs (<400m ISK) can run T4 gammas and electricals extremely efficiently.
- This is also the time to play with your favorite cruisers (preferably with at least Tech 2 tanks) in the abyss and see how they perform (T1 or Calm filament types are good for this). Most ships aren't great in the abyss, but as the game develops and the flavors of the year rotate, the ships that shine will change as well.
- Do not be alarmed that even the most blinged out fits use faction drones as opposed to T2 variants which tend to have more dps. Faction drones are often preferred because they have more HP. Abyssal rats will switch aggro to drones and nuke them off field incredibly fast so always watch drones!
*Caveat: do not use T1 destroyers. they are very difficult to fit a proper tank to and remain cap stable, they have good on-paper dps but for various reasons their application can suffer, and the reward increase is markedly less than just running a shitfit T1 cruiser in the same tier filament. If you have a dumb space friend you want to run sites with, either use 2 frigates or 2 T3Ds - but play around on Sisi first!
Expensive, but Forgiving Ships

We hope you like GILAs. In fact, we hope you looooooooove GILAs. Because that's what you're flying for the rest of forever.
Notes:
- Without HAC V there’s no point in bringing out the HACs, especially not the GSF CERBERUS which is, and I cannot stress this enough, NOT A PVE SHIP. DONT BRING DOCTRINE SHIPS YOU CAN BARELY FLY INTO THE ABYSS BECAUSE IT’S ALL YOU HAVE. WHAT THE FUCK.!?!.
- If you have to mess around with HACs then try playing with a DEIMOS, VAGABOND, or SACRILAGE on Sisi. They are actually pretty good, if you have good gunnery skills and a solid idea of how to brawl without melting.
- At this level you have a little cushion of money to spend on using (read: losing) ships in the abyss and playing with the environment. if you're not sure if you have the skills or not, then this is also a good time to look at assault frigates, as you will typically have enough of the associated weapons skills for gunnery or missiles to make them really shine. If you have multiple accounts, T4s are extremely entertaining to fly in 2-3 frigates (I recommend 2 Retributions and 1 Deacon in electricals if you want to experiment with multi-boxing).
- Worms and other faction frigates are also viable at this level, but if you're spending the money for a faction ship you should really be using GILAs. Also, flying a frigate of any type gets risky as there are certain rooms (Angel Rooms) that can absolutely shred frigates.
- Without spending more than 1b ISK on a ship, you're going to max out running almost every type of T4 (see: fittings), but if you're just starting out PLEASE FOR THE LOVE OF GOD RUN T3s FIRST.
- The GILA is the go to ship for abyssal deadspace and for a good reason, missiles and drones really shine here. And for less than 500M-1B ISK this is going to be the best ship you can fly. Your fitting should always reflect the filament type you're playing in. You absolutely can fly <1b ISK GILAs in T5s and win, but it requires the kind of skills you can't inject.
- We cannot recommend exotics enough, as this is also when filaments start getting really expensive. Did you really just pull 40M ISK from that T4 Electrical when it cost you 25M ISK for the filament? No, you didn’t. You brought in a whopping 15M ISK and now some pencil neck day trader is laughing at you for being a dummy. Filament prices need to be considered when you choose what type of filament to run. This is extremely important or you WILL fuck yourself over money-wise.
Expensive, Unforgiving Big Boy Ships

At this level you’re basically evaluating RISK vs REWARD. How long until your ship makes back the money it cost you, and how equipped is it to deal with EVERY POSSIBLE COMBINATION of rooms from the 36 chambers? Think you can't get 3 Karens in a row? You will. Think you won’t get back to back Angel rooms after jumping with 1/4 capacitor from a neuting sleeper room? You will. The purpose of blinging your ships in the abyss is to take that risk and drag it down as close to zero as possible.
At this level people bring the HACs back out. Sacrileges, Ishtars, Ikitursas, Deimos, super blingy GILAs (these poor bastards hit a DPS ceiling and so your bling needs to be on both DPS mods, implants, AND a tank), and even Stormbringers make their home here. You will want deadspace drip. You will want faction drip. That damage mod better be abyssal. You will be doing unspeakable things for a set of mid-grade crystals.
The cost of T5 electricals is still insane, and so your profits will mean that if you can’t run T6s then you're not as effective as doing T5 gammas or exotics. KEEP THIS IN MIND. Everything I’ve said for the space poors goes double for you! Watch those margins, be mindful of your builds, TEST FLY EVERYTHING. Read shitty threads by idiots who lost 5b ISK because OH SHIT THAT SPAWN HAS 5 NEUTING CRUISERS. Plan accordingly, and one day you'll be doing this shit for the challenge and not the isk.
Ship Fittings
If you have an older character/account, then you might be familiar with Singularity, EVE’s shitty test server. In addition to letting us get our hands on new patches early, Sisi has the added benefit of several fully stocked markets where everything, even PLEX, is listed at 100.00 ISK
Unfortunately they don’t pre-stock the market with Skill Injectors, but it is possible to buy plex dirt cheap and use that get some extractors, and ‘respec’ your character. If you wait two weeks after extracting skills, you can use the command /copyskills to update your Sisi character with your current skills, and go back to the way things used to be. This lets idiots like me test insanely blingy fits in abyssal deadspace without actually shelling out billions of isk only to immediately lose it to a SPARKGRIP drone… fuck. You can activate your account on Sisi using the EVE launcher, and if you’re going to mess with the abyss it’s absolutely the way to test things out. Especially if you are a space poor.
THESE FITS ARE GOING TO BE BROKEN UP BY COST, AND INCLUDE FILAMENT TYPE/RATING. I WILL TRY TO INCLUDE A CAVEAT IF THE FIT ACTUALLY REQUIRES THAT YOU BE COMPETENT AND NOT SOME F1 MONKEY. IF YOU WANT TO BE YOUR OWN SPECIAL SNOWFLAKE, JUST LOOK AT THE DPS AND EHP/S OF THESE SHIPS AND GO AND DO LIKEWISE.
Cheap & Forgiving Ship Fits
Caveat: These fits are a not meant to be set-in-stone but mainly reflects the author's preference at the present time. They should give an example of a starting line for ship fits, not a finishing line.
-
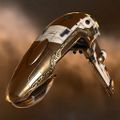 The Punisher
 -
 The Hookbill
 -
 The Hawk
 -
 The Caracal


Punisher, T1 Electrical, Exotic, Firestorm - Multi-tool
- Compact Multispectrum Energized Membrane
- Small ACM Compact Armor Repairer
- Small ACM Compact Armor Repairer
- Heat Sink II
- Heat Sink II
- 1MN Y-S8 Compact Afterburner
- Small Compact Pb-Acid Cap Battery
- Small Focused Modulated Energy Beam I, Imperial Navy Multifrequency S
- Small Focused Modulated Energy Beam I, Imperial Navy Multifrequency S
- Small Focused Modulated Energy Beam I, Imperial Navy Multifrequency S
- Small Focused Modulated Energy Beam I, Imperial Navy Multifrequency S
- Small Auxiliary Nano Pump I
- Small Energy Burst Aerator I
- Small Energy Locus Coordinator I
- Imperial Navy Standard S x4
Notes
- The Punisher is a beast at brawling in low-tier abyssals. It's also super flexible and can run a variety of filaments that drop so you get a lot of synergy with it.
[Kestrel, T0 Dark Abyssal - Alpha Friendly]
[Alpha Rocket Kestrel]
- Ballistic Control System II
- Ballistic Control System II
- 1MN Monopropellant Enduring Afterburner
- Small Compact Pb-Acid Cap Battery
- Small Compact Pb-Acid Cap Battery
- Small Shield Booster II
- 'Arbalest' Rocket Launcher I
- 'Arbalest' Rocket Launcher I
- 'Arbalest' Rocket Launcher I
- 'Arbalest' Rocket Launcher I
- Small Bay Loading Accelerator I
- Small Thermal Shield Reinforcer I
- Small EM Shield Reinforcer I
Mjolnir Rocket x2000
Inferno Rocket x2000
Nova Rocket x2000
[Caldari Navy Hookbill, Alpha T1 Dark Rocket]
- Ballistic Control System II
- Crosslink Compact Ballistic Control System
- 1MN Monopropellant Enduring Afterburner
- Small Shield Booster II
- Small Compact Pb-Acid Cap Battery
- Small Compact Pb-Acid Cap Battery
- Compact Thermal Shield Amplifier
- Rocket Launcher II
- Rocket Launcher II
- Rocket Launcher II
- Small Rocket Fuel Cache Partition II
- Small EM Shield Reinforcer I
- Small Hydraulic Bay Thrusters II
- This fit can also run with Meta 4 Light missile launchers and a +2 CPU Implant. Range will be ~74km with over 100 dps with faction light missiles making it a sniper in just about every room it enters.
[Caracal, T2 Gamma Caracal]
- Mark I Compact Power Diagnostic System
- Crosslink Compact Ballistic Control System
- Ballistic Control System II
- Ballistic Control System II
- Large F-S9 Regolith Compact Shield Extender
- Large F-S9 Regolith Compact Shield Extender
- Medium Compact Pb-Acid Cap Battery
- Multispectrum Shield Hardener II
- 50MN Cold-Gas Enduring Microwarpdrive
- Rapid Light Missile Launcher II, Nova Fury Light Missile
- Rapid Light Missile Launcher II, Nova Fury Light Missile
- Rapid Light Missile Launcher II, Nova Fury Light Missile
- Rapid Light Missile Launcher II, Nova Fury Light Missile
- Rapid Light Missile Launcher II, Nova Fury Light Missile
- Medium EM Shield Reinforcer II
- Medium Core Defense Field Extender I
- Medium Core Defense Field Extender I
- Warrior II x2
- Nova Fury Light Missile x2000
- Inferno Fury Light Missile x1000
- Mjolnir Fury Light Missile x1000
- Scourge Fury Light Missile x1000
[Hawk, T2 Exotic]
- Ballistic Control System II
- Ballistic Control System II
- Small C5-L Compact Shield Booster
- Cap Recharger II
- Cap Recharger II
- Small Compact Pb-Acid Cap Battery
- 5MN Y-T8 Compact Microwarpdrive
- Light Missile Launcher II, Scourge Fury Light Missile
- Light Missile Launcher II, Scourge Fury Light Missile
- [Empty High slot]
- Light Missile Launcher II, Scourge Fury Light Missile
- Light Missile Launcher II, Scourge Fury Light Missile
- Small Bay Loading Accelerator II
- Small EM Shield Reinforcer II
- Nanite Repair Paste x50
- Scourge Fury Light Missile x1500
[Retribution, T2E]
- Shadow Serpentis Small Armor Repairer
- Shadow Serpentis Assault Damage Control
- Heat Sink II
- Shadow Serpentis Small Armor Repairer
- Heat Sink II
- 1MN Y-S8 Compact Afterburner
- Small Compact Pb-Acid Cap Battery
- Small Focused Beam Laser II,Aurora S
- Small Focused Beam Laser II,Aurora S
- [Empty High slot]
- Small Focused Beam Laser II,Aurora S
- Small Focused Beam Laser II,Aurora S
- Small Energy Burst Aerator II
- Small Ancillary Current Router I
- Imperial Navy Xray S x8
- Imperial Navy Standard S x8
- Gleam S x8
- Aurora S x8
- Nanite Repair Paste x30
- Imperial Navy Multifrequency S x8
While a lot of sites promote the Worm as an excellent T1-T3 frigate for Exotics, it's a costly ship that requires similar skills to a Gila which will start you in Tier 3 even without much of a glue as to what to do. It is our opinion that if you can fly a worm, you should just go ahead and get into a Gila and work on T3s or do some T4s on the Test server. However, since the Worm is a very popular ship, the fit is posted here:
Worm - T1 & T2 EZ Mode (Not for Noobs)
[Worm - T1&T2 EZ Mode]
- Light Missile Launcher II
- Light Missile Launcher II
- Light Missile Launcher II
- 1MN Y-S8 Compact Afterburner icon
- Caldari Navy Small Shield Extender
- Caldari Navy Small Shield Extender
- Caldari Navy Small Shield Extender
- Drone Damage Amplifier II icon
- Drone Damage Amplifier II icon
- Small Core Defense Field Purger II
- Small Core Defense Field Purger II
- Small Core Defense Field Purger II
- Hobgoblin II
- Inferno Fury Light Missile x2200
- Hornet II x2
- Caldari Navy Scourge Light Missile x406
Mid Range T3-T4 Ships
There are two schools of thought here when it comes to fittings: passive tank or active tank? Passive tanks require a little more forethought and experience but have greater dps and cap stability (reinforcement against neuting ships). Active tanks tend to be better for pilots with less experience in the abyss because the active reps act as a good "oh shit I messed up" button.
-
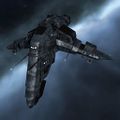
 Gila
Gila -
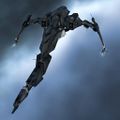
 Ishtar

The Passive Gila
You absolutely need to run T3s plenty of times to understand how to fly this fit. This is a PASSIVE tank. You have no OH SHIT IM A GOON(or a Pubbie[or both]) AND FUCKED UP button.
[Gila, T4 Exotic Passive]
- Drone Damage Amplifier II
- Shield Power Relay II
- Shield Power Relay II
- Shield Recharger II
- Federation Navy 10MN Afterburner
- Large Shield Extender II
- Large Shield Extender II
- Large Shield Extender II
- Large Shield Extender II
- Drone Link Augmentor I
- Rapid Light Missile Launcher II, Caldari Navy Scourge Light Missile
- Rapid Light Missile Launcher II, Scourge Fury Light Missile
- Rapid Light Missile Launcher II, Scourge Fury Light Missile
- Rapid Light Missile Launcher II, Scourge Fury Light Missile
- Medium Core Defense Field Purger II
- Medium Core Defense Field Purger II
The Active Gila
This is a pretty safe ship to fly in the abyss, so safe, an Alpha pilot could fly it no problem. To improve the fit, upgrade the meta modules to whatever flavor of expensive drip you prefer. It's okay if you aren't cap stable with both reps running, as long as you are cap stable with one running you'll be fine. You shouldn't turn everything on as soon as you hit the room anyways unless you know you are about to eat some serious heat.
[Gila, Alpha ready T4 Electrical Gila]
- Damage Control II
- Drone Damage Amplifier II
- Drone Damage Amplifier II
- Republic Fleet Large Cap Battery
- Pithum C-Type Medium Shield Booster
- Pithum C-Type Medium Shield Booster
- Multispectrum Shield Hardener II
- Multispectrum Shield Hardener II
- 10MN Afterburner II
- Prototype 'Arbalest' Rapid Light Missile Launcher, Caldari Navy Scourge Light Missile
- Prototype 'Arbalest' Rapid Light Missile Launcher, Caldari Navy Scourge Light Missile
- Prototype 'Arbalest' Rapid Light Missile Launcher, Caldari Navy Scourge Light Missile
- Prototype 'Arbalest' Rapid Light Missile Launcher, Caldari Navy Scourge Light Missile
- Medium EM Shield Reinforcer II
- Medium Capacitor Control Circuit I
- Medium Capacitor Control Circuit II
- Imperial Navy Infiltrator x4
- Caldari Navy Mjolnir Light Missile x1580
- Medium Core Defense Field Purger II
- Scourge Fury Light Missile x5000
- Vespa II x2
Drugs
- Agency 'Hardshell' TB5 Dose II
- Standard Blue Pill Booster
Implants
- Zainou 'Gnome' Shield Management SM-703
- Zainou 'Gnome' Shield Operation SP-903

Multiboxing Confessors
If you have a friend, this is a great option to do together. However, if you're like most EVE players and lack friends, this is a good option for multiboxing and/or learning to multibox without risking too much isk. It is possible to do the same with Jackdaws but at 2-3x the price.
[Confessor, T3-4 Electric Confessor]
- Navy Micro Auxiliary Power Core
- Coreli A-Type Small Armor Repairer
- Heat Sink II
- Heat Sink II
- Reactive Armor Hardener
- Federation Navy 10MN Afterburner
- Republic Fleet Small Cap Battery
- Republic Fleet Small Cap Battery
- Small Focused Pulse Laser II
- Small Focused Pulse Laser II
- Small Focused Pulse Laser II
- Small Focused Pulse Laser II
- Small Ancillary Current Router II
- Small Nanobot Accelerator II
- Small Ancillary Current Router I
- Scorch S x8
- Nanite Repair Paste x100
- Conflagration S x12
Active Rep Ishtar w/Sentries


The Ishtar, without a doubt, is one of the all-time best PVE ships in the game. With max support skills there is hardly anything that this ship cannot do. The big appeal with this ship is that you can safely run T4 electricals and take advantage of the static loot tables for the resource caches. Pop all of them with your sentry at the beginning and drop your MTU, orbit and wait for your drones to finish murdering all the rats. Bing bong you’re well on your way to building those Triglavian BPCs!
[Ishtar, These Men Are Pawns]
- Drone Damage Amplifier II
- Drone Damage Amplifier II
- Federation Navy Drone Damage Amplifier
- Caldari Navy Power Diagnostic System
- Capacitor Flux Coil II
- Shadow Serpentis Assault Damage Control
- Pith C-Type X-Large Shield Booster
- 50MN Cold-Gas Enduring Microwarpdrive
- Gistum C-Type Multispectrum Shield Hardener
- Republic Fleet Large Cap Battery
- Medium EM Shield Reinforcer II
- Medium EM Shield Reinforcer II
- Wasp II x10
- Warden II x2
- Mobile Tractor Unit
With a little more bling (upgrade the DDA to faction) and get a set of decent implants the Ishtar is an excellent choice for pushing into T5 and T6 terrritory. That said, Heavy Assault Cruiser 5 fully trained is a must and drone support skills to 5 is a must as well.
Expensive High End Bling Boats T5-T6
These babies will run north of 1bil ISK just for fits and hulls and can easily go up another bil for implants. So, on average, this is a 2bil ISK investment, so make sure you are comfortable losing it before dabbling. While it might take a while to get that amount of ISK back, the challenges you overcome in the meantime will be quite rewarding on their own, even if it only amounts to a hilarious killmail.
Idiot Proof T5 Gila (Passive Tank)
Name says it all. It's passive fit so know how to fly it (not for complete idiots obv). This is the preferred ship of this author.
[Gila, *Screw neuts T5]
- Drone Damage Amplifier II
- Caldari Navy Shield Power Relay
- Caldari Navy Shield Power Relay
- Republic Fleet Shield Recharger
- Federation Navy 10MN Afterburner
- Thukker Large Shield Extender
- Thukker Large Shield Extender
- Thukker Large Shield Extender
- Thukker Large Shield Extender
- Drone Link Augmentor I
- Rapid Light Missile Launcher II
- Rapid Light Missile Launcher II
- Rapid Light Missile Launcher II
- Rapid Light Missile Launcher II
- Medium Core Defense Field Purger II
- Medium Core Defense Field Purger II
- Medium Core Defense Field Purger II
- Vespa II x10
- Nanite Repair Paste x100
- Scourge Fury Light Missile x2000
Implants
- Zainou 'Deadeye' Rapid Launch RL-1003 x1
- Mid-grade Nirvana Alpha x1
- Mid-grade Nirvana Beta x1
- Mid-grade Nirvana Delta x1
- Mid-grade Nirvana Epsilon x1
- Mid-grade Nirvana Gamma x1
- Mid-grade Nirvana Omega x1
- Agency 'Overclocker' SB3 Dose I x1
- Zainou 'Gnome' Shield Management SM-705 x1
- Zor's Custom Navigation Hyper-Link x1
- Zainou 'Gnome' Shield Operation SP-905 x1

Idiot Proof T5 Gila (Active Reps)
Ships will active reps will always be a little more labor intensive than ships with passive or buffer tanks. That said, spending oodles of money on a blingy tank will do nothing if money is not invested in damage mods. Which is why, running in the land of T5 and T6, damage mods, implants, and drugs cannot be ignored. They are necessary.
[Gila, T5 Runner]
- Imperial Navy Drone Damage Amplifier
- Imperial Navy Drone Damage Amplifier
- Imperial Navy Drone Damage Amplifier
- Pithum A-Type Medium Shield Booster
- Republic Fleet Medium Cap Battery
- Gistum C-Type 10MN Afterburner
- Gistum A-Type Multispectrum Shield Hardener
- Republic Fleet Large Cap Battery
- Pithum A-Type Medium Shield Booster
- Upgraded 'Malkuth' Rapid Light Missile Launcher
- Upgraded 'Malkuth' Rapid Light Missile Launcher
- Upgraded 'Malkuth' Rapid Light Missile Launcher
- Upgraded 'Malkuth' Rapid Light Missile Launcher
- Drone Link Augmentor I
- Medium Capacitor Control Circuit II
- Medium Semiconductor Memory Cell II
- Medium Thermal Shield Reinforcer I
- 'Augmented' Hammerhead x2
- 'Augmented' Vespa x2
- Vespa II x6
- Caldari Navy Scourge Light Missile x1040
- Nanite Repair Paste x69
Drugs
- Agency 'Hardshell' TB5 Dose II x1
- Standard Blue Pill Booster x1
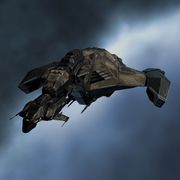
The Ikitursa - Not for Idiots

The Ikitursa is the 3rd most common ship in high level abyss runs, topped only by the Ishtar and Gila. So, it makes sense to add it to the guide as an option for those who have more money than sense (although it is a super fun brawly ship to fly).
[Ikitursa - The Fist of the Firestorm ]
- Veles Heavy Entropic Disintegrator
- Republic Fleet Medium Cap Battery
- Thukker Large Cap Battery
- Corelum B-Type 10MN Afterburner
- Caldari Navy Stasis Webifier
- Centum C-Type Energized Adaptive Nano Membrane
- Medium Ancillary Armor Repairer
- Centum A-Type Medium Armor Repairer
- Reactive Armor Hardener
- Entropic Radiation Sink II icon Entropic Radiation Sink II
- Entropic Radiation Sink II icon Entropic Radiation Sink II
- Medium Auxiliary Nano Pump II
- Medium Auxiliary Nano Pump II
- Federation Navy Hobgoblin icon Federation Navy Hobgoblin x5
- Federation Navy Hammerhead icon Federation Navy Hammerhead x5
- Occult M
- Mystic M
- Nanite Repair Paste icon
- Synth Drop Booster
- Agency 'Pyrolancea' DB5 Dose II icon
- Improved Exile Booster
- Mid-grade Asklepian Epsilon
- Mid-grade Asklepian Omega
- Eifyr and Co. 'Gunslinger' Surgical Strike SS-903
- Inquest 'Eros' Stasis Webifier MR-805
- Mid-grade Asklepian Alpha
- Mid-grade Asklepian Beta
- Mid-grade Asklepian Gamma
- Mid-grade Asklepian Delta
The T6 Abysstar

[Ishtar, King of the Abyss]
- Sentient Omnidirectional Tracking Enhancer
- Imperial Navy Drone Damage Amplifier
- Imperial Navy Drone Damage Amplifier
- Imperial Navy Drone Damage Amplifier
- True Sansha Power Diagnostic System
- Shadow Serpentis Assault Damage Control
- Gist X-Type X-Large Shield Booster
- Gistum A-Type 10MN Afterburner
- Republic Fleet Large Cap Battery [1]
- Pithum A-Type Multispectrum Shield Hardener
- Dual Light Beam Laser II, Imperial Navy Gamma S
- Dual Light Beam Laser II, Imperial Navy Gamma S
- Dual Light Beam Laser II, Imperial Navy Gamma S
- Dual Light Beam Laser II, Imperial Navy Gamma S
- Medium Capacitor Control Circuit II
- Medium EM Shield Reinforcer II
- 'Augmented' Valkyrie x3
- 'Augmented' Valkyrie x2
- Gecko x2
- Gecko x1
- Republic Fleet Berserker x5
- Republic Fleet Berserker x1
- Republic Fleet Warrior x4
- Republic Fleet Warrior x1
- High-grade Crystal Alpha
- High-grade Crystal Beta
- High-grade Crystal Gamma
- High-grade Crystal Delta
- High-grade Crystal Epsilon
- High-grade Crystal Omega
- Overmind 'Goliath' Drone Tuner T25-10S
- Inherent Implants 'Squire' Capacitor Management EM-806
- Black Market 'Valdimar' Drone Durability DD-1005
- Standard Blue Pill Booster
- Agency 'Hardshell' TB9 Dose IV
- Aurora S x8
- Gleam S x8
- Imperial Navy Gamma S x4
- 'Magpie' Mobile Tractor Unit x1
- [1] Republic Fleet Large Cap Battery
Gravid Large Cap Battery Mutaplasmid
Notes:
- The single most important module on this ship is the Large Cap Battery. Only abyssal will do. Ensure it has at least 2100GJ extra capacity and 31% or better for Cap Warfare Resistance. Your cap stats in pyfa should show cap stability at 58% or better. The other question that is likely to occur is about the choice for lasers. I like being able to ammo/range quickly, so I went with those. You can also use 280mm arties if you prefer.
- For drones, you're going to want to use Geckos. Group them into two separate groups. One Gecko and one Valk per group. The third group is one Republic Fleet Warrior.
- Your overall stats should be over 1400ehp/s for your tank and more than 900dps for your gank.
- Finally, make sure you pre-roll your blue pill. You don't want any negative side effects. You can get three abyssal runs in on one pill if you have Biology V (you should). This is not a fit for the poor-of-heart. It is made for pushing T6 into the ground but if you don't have the skill please do not get in this ship.
- Start each room by quickly evaluating your targets and make an initial piloting decision. 95% of the time, you can fly straight to the biocache. That other 5% will be covered in the subsequent sections. Launch group one, group two, and your light drone. Lock up the high priority targets and one or two of the subnodes. Your light drones is sent off to pop the nodes while group one and group two attack.
- Your drones are likely to suffer some damage, but that's OK. I usually only recall them if they sink into half armor. Most of the time they'll be able to shield tank many enemies so long as you clear the field pretty quickly and don't have a shitty spawn.
Loot

"Hey there little man, put that money in my hand."
The main difference from making money in the abyss vs. ratting in normal space or running missions is that there is no direct ISK payout. "Red loot" or the Trigalavian Surveys are the closest thing to a static ISK payout in the abyss because each survey is worth 100,000 ISK which can then be paid at your local Concord station (somewhere in Empire space). The rest, blue prints, mutaplasmids, filaments, isogen-10, skillbooks, and everything else - have varying values depending on what they are being used for.
Loot Drop Rates & Expectations
Loot drops follow these approximate probabilities. Use this to calculate realistic income rather than relying on lucky drops.
- Survey Database: ~98% drop rate (Reliable baseline income).
- Zero-Point Condensate: ~77% drop rate.
- Isogen-10: ~73% drop rate.
- Filament Returns: ~10% drop rate (You cannot self-sustain filaments; you must buy replacements).
- High-Value Mutaplasmids: ~4% drop rate (Rare).
Median Payout Per Run (excluding lucky drops):
- T6 Cruiser: ~100M - 120M ISK
- T5 Cruiser: ~60M - 80M ISK
- T4 Cruiser: ~25M - 40M ISK

Loot Notes
- Isogen-10 and Zero-Point Condensate are used in the production of Triglavian Ships and their modules/ammo. Generally, Trig ship makers will buy these at a good rate - but they can always be taken to a trade hub and sold relatively easily.
- Blueprint Copies have a value which can be determined by looking them up in the contract market.
- For info on mutaplasmids EVE Uni has a very good guide: Making Abyssal Modules
- Abyss Tracker has a wealth of knowledge about anything and everything in the abyss, especially loot and - where to get it. Go here to learn more about what drops what.
- Another way to maximize your money in the abyss is to setup a Triglavian production line, especially if you already have a manufacturing/science character. The startup cost is not the cheapest (this author can attest) but once things get moving you'll become an ISK printer in no time!
- You will get more loot running an abyssal site in a Frigate than you will in a Cruiser b/c loot scales depending on how many people CCP thinks are in your fleet. While you can run with 3 friends (who has those - amirite?) you have to deal with splitting loot - so solo is a good bet. That said, you will rarely find solo frigs outside of T2 b/c the damage mitigation isn't there. The loot table for solo Cruiser is not great below T3, so if you are running a solo Cruiser in a T1 or T2, be advised - you'll make more in a Hawk or Worm.
- Consider the cost of the filament for each type of abyss you run, as that will cut into your profits. If you are running T4 exotics and making 20 mil a run because RNG hates you, factor in the 6 mil for the filament and get ready to get sad. Hence, running low grade abyssals T1-T2 can in some ways be more profitable as you don't have nearly as high a filament cost. It's a delicate balance.
Thank you for visiting this guide. If something is amiss or needs updating please contact the wiki Janitor team.